Download the instructions here below RLS instructions.pdf
RLS clip/wedge levelling system instructions
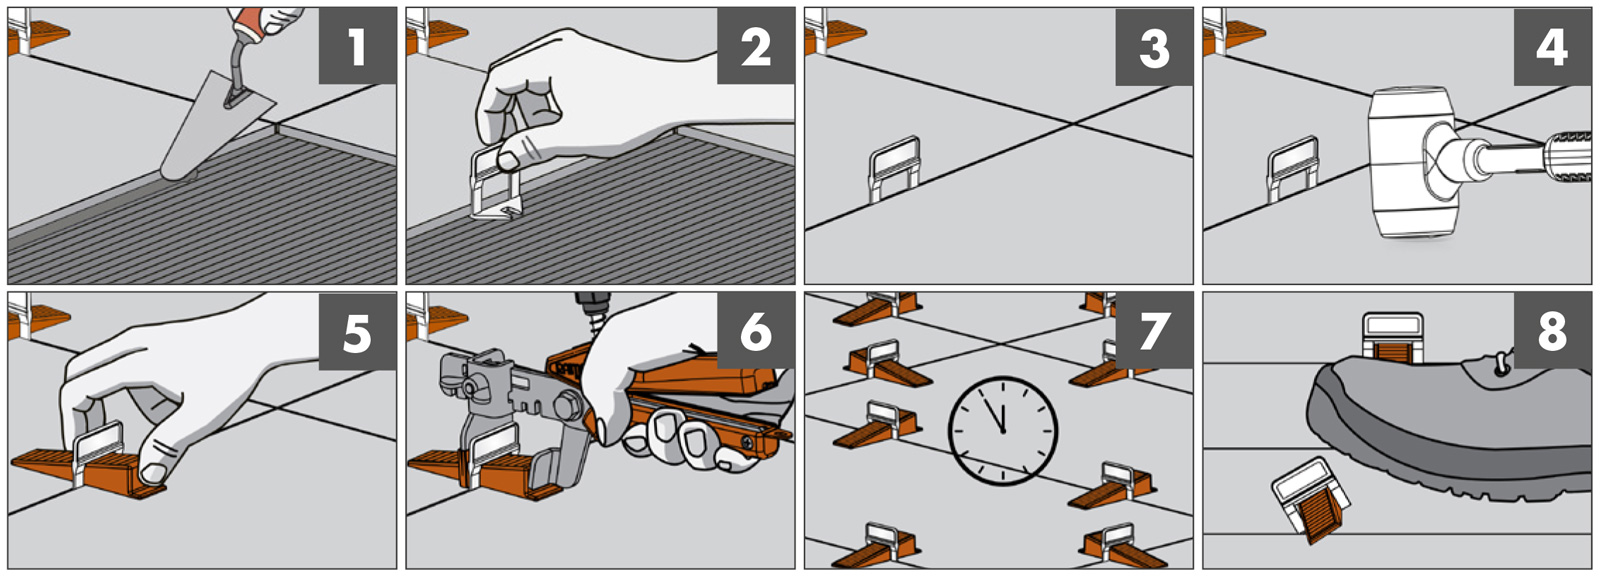
1. Spreading of the adhesive
 -The correct use of a levelling system requires that the layer of adhesive, after spreading, has a thickness sufficient to completely embed the base of the clip in it.
– Regarding the exact thickness of the adhesive layer, please consult the local installation regulations and the producer recommendations of the adhesive used.
2. Placement of the clip
- In order to limit the rise of the adhesive in the joint, remove a thin layer of adhesive near the edge of the tile, before inserting the clip (pic.1);
- According to the size of the tile or slab, place one or more clips on each side (pic.2) inserting them under the tile;
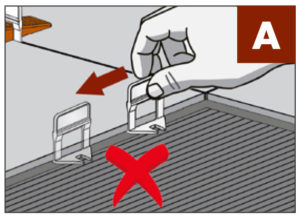
 Once the clips have been placed, do not move them sideways along the edge of the tile or slab. This would create voids of adhesive underneath the tile or slab (pic.A).
- Lay the tile or slab by applying the necessary pressure for a good bond of the adhesive (pic.3), possibly with the help of suitable equipment to beat or vibrate the tile or slab (pic.4).
3. Insertion and traction of the wedge
- Insert the wedge into the slot of the clip, taking care not to exceed the breaking point (maximum load) of the clip (pic.5);
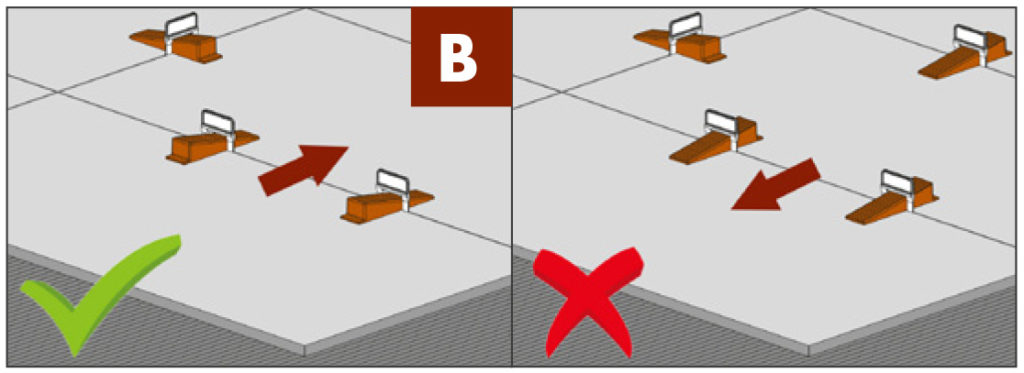
- Always insert the wedge from the fresh tile side toward the tile previously installed (pic.B);
- To facilitate the insertion of the wedge, is strongly recommended to use the adjustable pliers (pic. 6) correctly calibrated according to the thickness of the tile (for instructions click here)
4. Removal of the clips
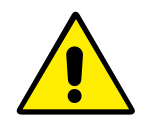
– During the removal phase, the part of the clip that is removed might travel several meters away. To prevent injury, before removing the clips, make sure there are no people in the area. For this operation, wear protective goggles and safety shoes.
– Do not remove the clips before the adhesive got dry. Removing the clips before the adhesive is dry can lead to lippage between the tiles and the not correct functioning of the levelling system.
- Wait that the adhesive is completely dry (pic.7);
- Once the adhesive is dry, remove the part of the clip that stick out from the tiles by hitting it in the direction of the joint line with a rubber hammer or with a kick (pic.8).
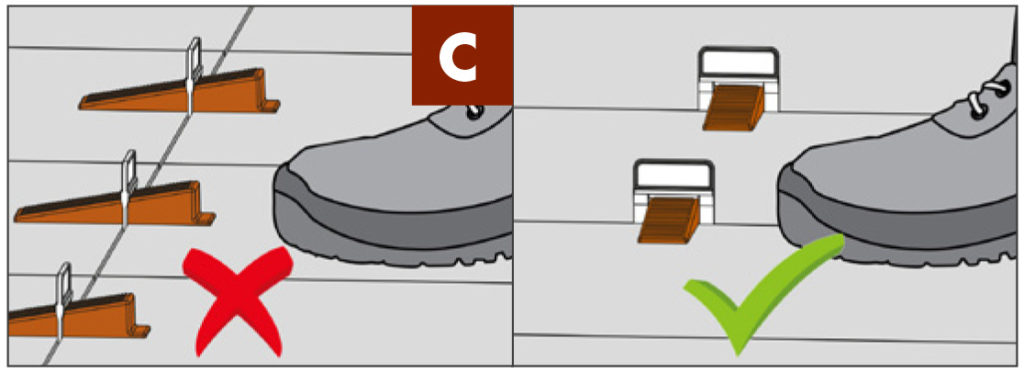 Do not hit the clips perpendicularly to the direction of the joint line (pic.C).
5. How to use the anti-chipping and anti-scratch RLS platform
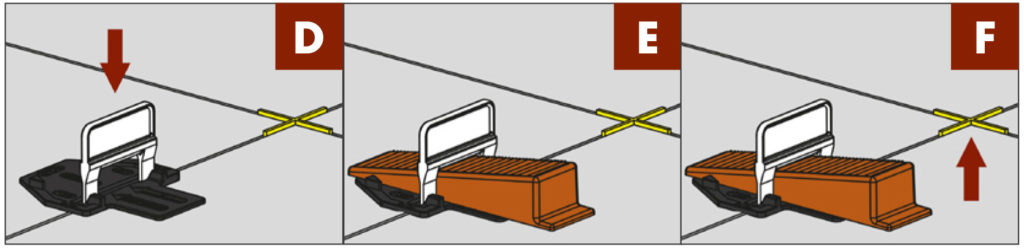
– For tiles or slabs with particularly delicate edges, it is recommended to use the platform to prevent chipping (pic.D and E). It is also recommended the combined use of a traditional spacer that creates a joint greater than the sum of the thickness of the clip and the additional thickness (0.5 mm) of the anti-chipping platform (pic.F).– The platform also performs an anti-scratch function since the wedge does not touch the tile but slides on the platform instead. Consider its use in the presence of tiles with a particularly delicate surface (pic.E).
– The platform is reusable and suitable with all clips of the RLS clip/wedge system except the 1mm clip (V2).
6. Recycling the materials
– Non-reusable parts must be disposed in compliance with local regulations in force, preferring whenever possible, the correct differentiation of waste.
- When the removal is completed, proceed to collect and divide the parts;
- Save wedges and platforms as they are re-usable.
7. Troubleshooting
For any problem not listed in the following table, contact the Raimondi service centers.
Clips break during traction.
• Reduce the pushing load applied onto wedge.
• It is recommended the use of the plier (for instructions click here).
• Reduce the pushing load applied onto wedge.
• It is recommended the use of the plier (for instructions click here).
The tile is chipped.
• On extremely delicate tiles, use the anti-chipping and anti-scratching platform in combination with a traditional spacer (see chapter 5).
• On extremely delicate tiles, use the anti-chipping and anti-scratching platform in combination with a traditional spacer (see chapter 5).
The tile is scratched.
• On extremely delicate tiles, use the anti-chipping and anti-scratching platform in combination with a traditional spacer (see chapter 5).
• On extremely delicate tiles, use the anti-chipping and anti-scratching platform in combination with a traditional spacer (see chapter 5).
Tiles are not correctly levelled.
• Check the number of Clips used per each tile side is sufficient to guarantee correct levelling and only use original Raimondi wedges and pliers;
• Do not step on the floor before the adhesive is completely dry.
• Check the number of Clips used per each tile side is sufficient to guarantee correct levelling and only use original Raimondi wedges and pliers;
• Do not step on the floor before the adhesive is completely dry.
During removal, some clips break incorrectly.
• Check that there is not too much adhesive that has risen inside the joint;
• Check the amount of adhesive which might have filled the joint;
• Make sure the removal was performed once the adhesive got dry;
• Ensure to hit the clips parallel to the direction of the joint line (see chapter 4).
• Check that there is not too much adhesive that has risen inside the joint;
• Check the amount of adhesive which might have filled the joint;
• Make sure the removal was performed once the adhesive got dry;
• Ensure to hit the clips parallel to the direction of the joint line (see chapter 4).
Copyright © 2021 – Raimondi S.p.A. – Tutti i diritti sono riservati – All Rights Reserved
Download the pdf RLS istructions