BASI “3D” – “3D” CLIPS – Raimondi Levelling System 3D
Il sistema R.L.S. si arricchisce con l’innovativa base “3D” (patent pending).

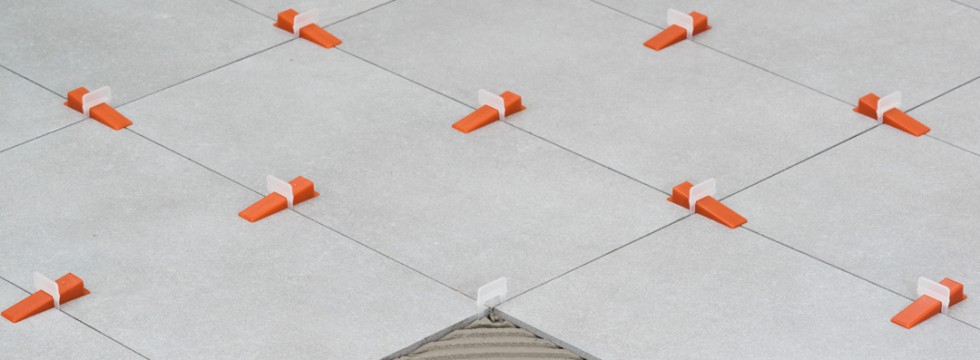
Grazie agli elementi distanziali retraibili la base “3D” può essere posizionata sia sugli incroci che sui lati delle piastrelle. Quindi, nel caso di posa di grandi formati, per i quali la sola base posizionata negli incroci è insufficiente per garantire il pefetto livellamento, la base “3D” si utilizza in entrambe le posizioni.
La base “3D” è utilizzabile con gli stessi cunei e le stesse pinze delle altre basi del sistema R.L.S..
La configurazione planare, con la quale la base “3D” si presenta, riduce i volumi di traspoto del 50% rispetto agli R.L.S. standard.
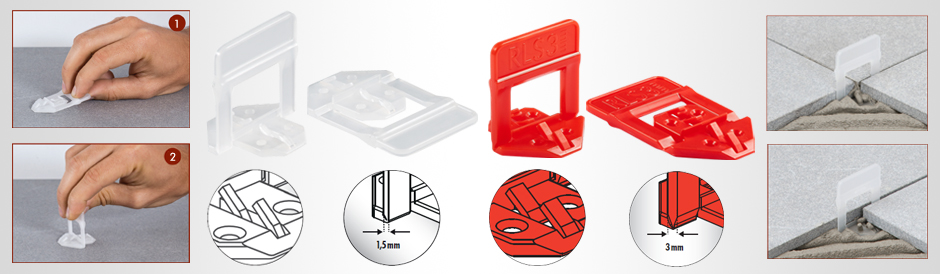
Prima dell’utilizzo, con un semplice e rapido movimento, portare in posizione verticale il ponte della base “3D”.
Larghezza minima del giunto: 1.5 mm; massima: 3 mm.
Spessore piastrella: minimo 3 mm, massimo 12 mm.
 Oltre ad assolvere alla funzione livellante, la base “3D” crea la fuga sia con posa a “+” che a “T” in entrambi i lati ortogonali delle piastrelle.
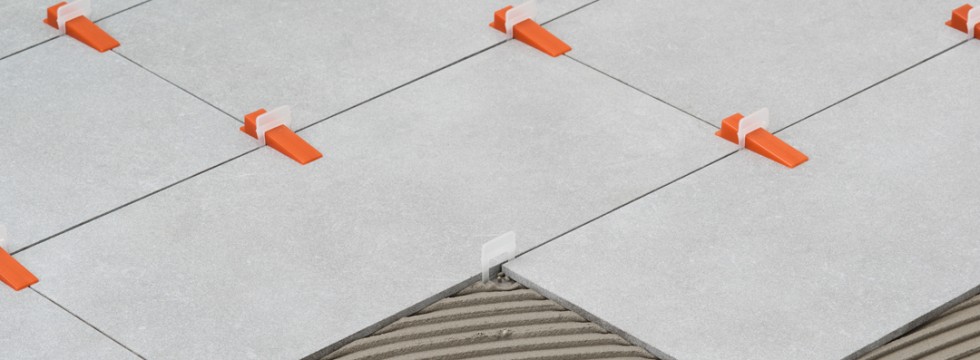
Posa a "+" con posizionamento sia sull'incrocio che sul lato delle piastrelle
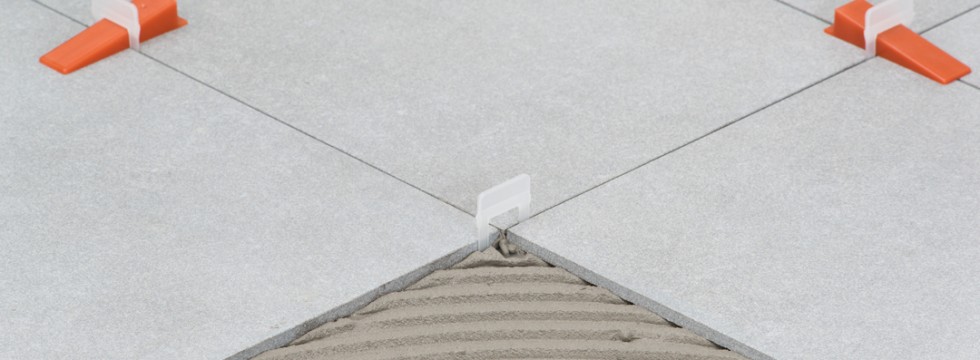
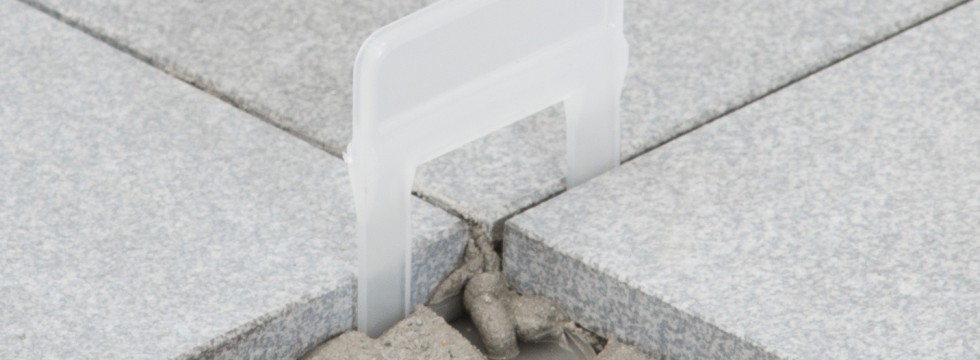
Dettaglio posizionamento sull'incrocio piastrelle
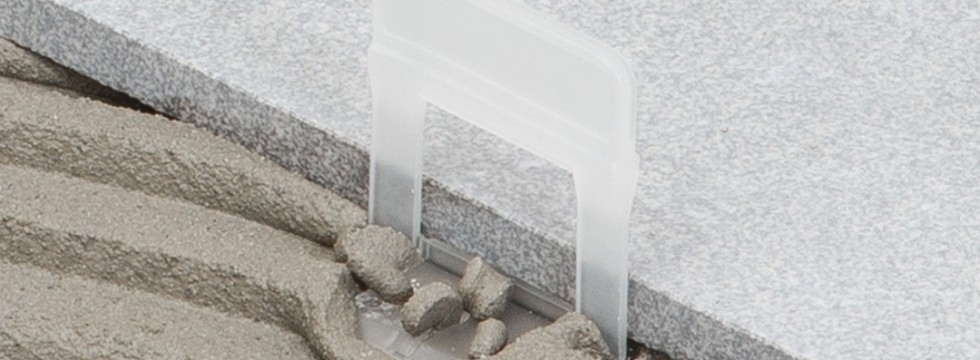
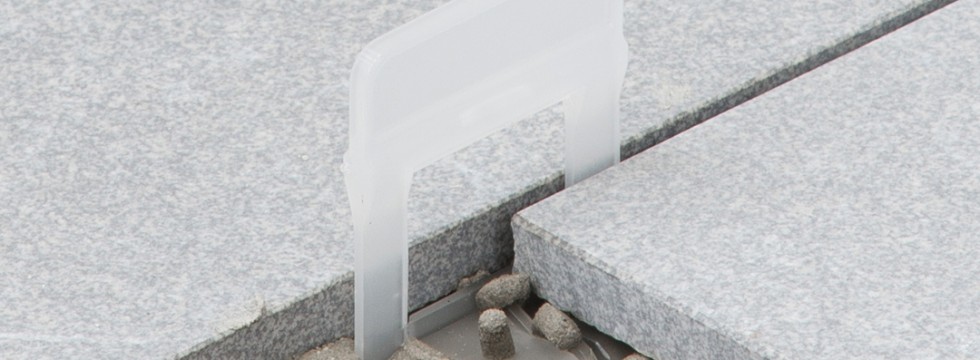
Dettaglio posizionamento sul lato piastrelle


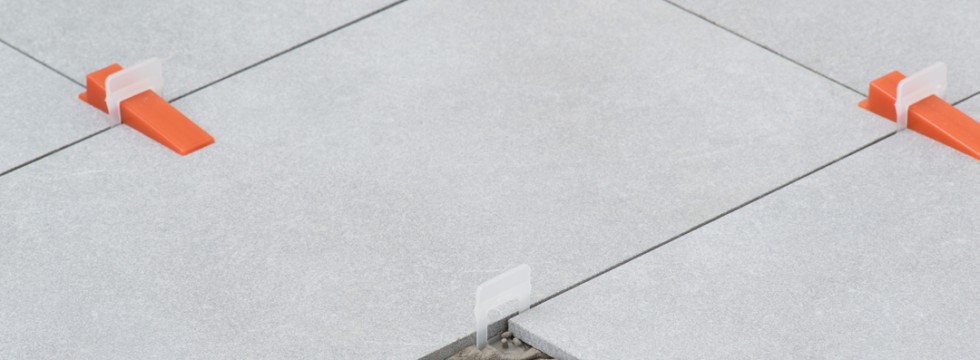
Posa a "T" con posizionamento suIl'incrocio delle piastrelle
Dettaglio posizionamento sull'incrocio piastrelle


La base 3D, potendo essere utilizzata sia sugli incroci che sui lati delle piastrelle, consente di utilizzare fino al 76%* in meno di basi (rispetto alle basi standard utilizzate solo sui lati delle piastrelle).
L’effettivo risparmio varia in funzione del formato della piastrella.
Clicca qua per confrontare i consumi.
* formato 30x30
Scarica istruzioni
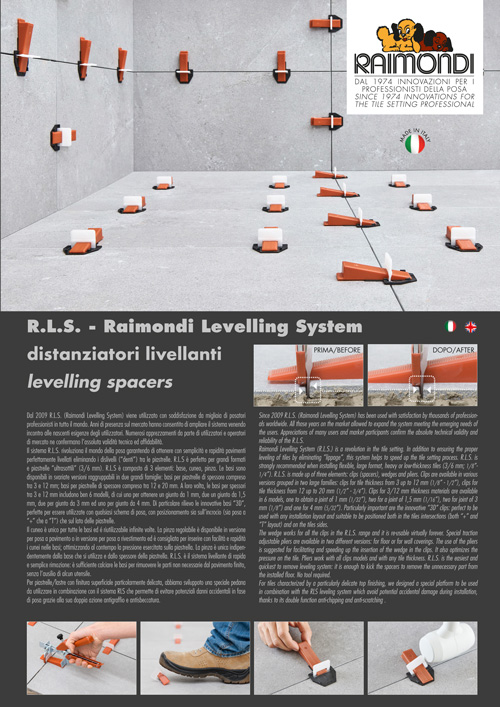
R.L.S. enhances thanks to the innovative “3D” clip (patent pending)
Thanks to the retractable “spacing fins”, the “3D” clip is suitable to be positioned both in the tiles intersections (both “+” and “T” layout) and on the tiles sides. So, when installing large format tiles, for which putting the clips just in the tiles intersections is not sufficient to ensure proper leveling (“lippage” removal), the “3D” clip can be used in both positions.
The “3D” clip accepts the same wedges and pliers of all other R.L.S. clips.
The “3D” clip is shipped in flat position so to reduce volumes by nearly 50% (in comparison with the standard R.L.S. clip).
Prior to use, with a simple and fast movement, put the “3D” clip bridge in vertical position.
Minimum joint size: 1,5 mm (1/16”); maximum: 3 mm (1/8").
Suitable for tiles thickness from 3 mm (1/8”) up to 12 mm (1/2”).
In addition to level (“lippage” removal), the "3D" clip creates the joint (both with “+” and “T” layout) in both orthogonal sides of the tiles.
Use with "+" layout both on tiles intersections and sides.
On tiles intersection. Detail.
On tiles side. Detail.
Use with “T” layout on tiles intersections.
On tiles intersection. Detail.
3D Clip, being suitable to be used both on sides and intersection of the tiles, allow to use up to 76% * less clip (compared to the standard clips used only on tiles sides).
The actual saving varies according to the tile size.
Click here to compare the 3D and standard (classic) clips consumption.
* tile size 30x30 cm
Download instructions
![]()